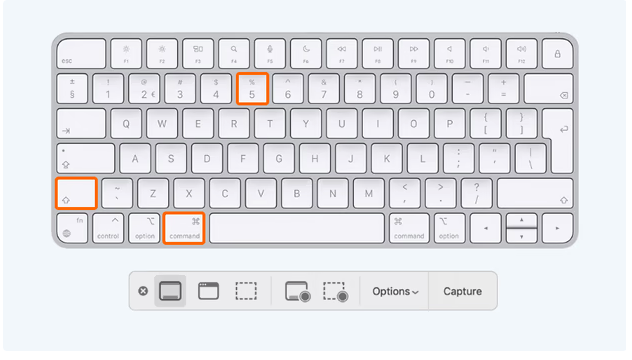
Capturing screenshots is an essential skill, whether you're troubleshooting an issue, saving an image, or creating a tutorial. Both Mac and Windows systems offer multiple methods to capture your screen. Here’s a comprehensive guide to taking screenshots on both operating systems.
Taking a Screenshot on Mac
1. Capture the Entire Screen:
- Shortcut: Press
Command (⌘) + Shift + 3 - The screenshot will be saved automatically to your desktop.
2. Capture a Selected Portion of the Screen:
- Shortcut: Press
Command (⌘) + Shift + 4 - Your cursor will turn into a crosshair. Click and drag to select the area you want to capture. Release the mouse button to take the screenshot, which will be saved to your desktop.
3. Capture a Specific Window:
- Shortcut: Press
Command (⌘) + Shift + 4, then pressSpacebar - Your cursor will turn into a camera. Click on the window you want to capture. The screenshot will be saved to your desktop.
4. Using the Screenshot App:
- Shortcut: Press
Command (⌘) + Shift + 5 - This opens the Screenshot toolbar, which provides options for capturing the entire screen, a selected portion, or a specific window. You can also record your screen from this toolbar.
5. Capturing the Touch Bar (MacBook Pro Only):
- Shortcut: Press
Command (⌘) + Shift + 6 - The screenshot of your Touch Bar will be saved to your desktop.
Taking a Screenshot on Windows
1. Capture the Entire Screen:
- Shortcut: Press
Print Screen (PrtScn) - This captures the entire screen and copies it to the clipboard. You can paste it into an application like Paint or a document by pressing
Ctrl + V.
2. Capture the Entire Screen and Save Automatically:
- Shortcut: Press
Windows Key + Print Screen (PrtScn) - The screenshot will be saved automatically to the
Screenshotsfolder in yourPictureslibrary.
3. Capture the Active Window:
- Shortcut: Press
Alt + Print Screen (PrtScn) - This captures the currently active window and copies it to the clipboard. You can paste it into an application by pressing
Ctrl + V.
4. Using the Snipping Tool:
- Open the Snipping Tool application. Click
Newand select the area you want to capture. You can save the screenshot manually after capturing it.
5. Using Snip & Sketch:
- Shortcut: Press
Windows Key + Shift + S - Your screen will dim, and you can select the area you want to capture. The screenshot is copied to the clipboard, and a notification will appear, allowing you to annotate and save the screenshot.
6. Using the Game Bar:
- Shortcut: Press
Windows Key + G - This opens the Game Bar. Click on the camera icon or press
Windows Key + Alt + Print Screen (PrtScn)to take a screenshot. The screenshot is saved in theCapturesfolder inside yourVideoslibrary.
Conclusion
Taking screenshots on both Mac and Windows is straightforward once you know the shortcuts and tools available. Whether you need to capture your entire screen, a specific window, or a custom area, these methods will help you achieve your goal quickly and efficiently. Happy screenshotting!


